Set up Firebase
Honeycomb comes with methods and configurations for easy Firebase and Cloud Firestore set up. Please use this section to configure Firebase Hosting services and Firestore cloud storage.
Setting up Firebase
0. Installing the Firebase Command Line Interface
To check if firebase has been installed, type firebase into a terminal window.
firebase
If a list of options are printed on the terminal then the firebase tool has already been installed. If not, you will get an error - something along the lines of "Command not found." The firebase-cli can then be installed using npm:
npm install -g firebase-tools
The -g flag installs an npm package globally on your system, as opposed to the current project
1. Initializing Firebase account and project
-
Create and login to a Firebase account on the Firebase website.
-
Create a Firebase project by clicking add project and enter a Project Name.
2. Linking firebase to task
-
Login to Firebase using
firebase logincommand in the terminal. -
Navigate to the
.firebasercfile home directory and edit the"default"field with the project name given in part 1.
{
    "projects": {
        "default": "<your project name>"
    }
}
3. Copying web app credentials
- Navigate to the firebase console and select the project.
- Create a new Web App by clicking on
Add Appor the</>code symbol and following the prompts. - Enter the a name for the Firebase app (could be the same as your Honeycomb task repo name).
- Check "Also set up Firebase Hosting for this app."
- Click
Register App. This should auto-generate a script with several values that you need to copy into the next step. - Copy the auto-generated values from the Firebase console to the corresponding variables in the
.env.firebasefile in theenvfolder of your Honeycomb task repo:
REACT_APP_FIREBASE="true"
REACT_APP_apiKey=
REACT_APP_authDomain=
REACT_APP_projectId=
REACT_APP_storageBucket=
REACT_APP_messagingSenderId=
REACT_APP_appId=
- Copy the auto-generated values from the Firebase console to the corresponding variables in the
.env.firebaseyou just created.- You only need to copy the variables referenced here. If you enabled Google Analytics during project creation, additional variables may be printed in the console. You don't need to copy those.
Firebase is now set up!
Setting up Firestore
Honeycomb includes cloud storage for task data using Firestore. Follow these steps to initialize Firestore:
- Navigate to the current project in the developer console and select
Firestore Databasefrom the sidebar. - Click
Create Database, selectproduction modeand choose the current location for the cloud storage bucket.
Firestore security rules
Firestore Security Rules provides easy server-side authorization to the database. For a honeycomb task, we use the security rules to allow access to only authorized participants for a specified study. Honeycomb's default set of rules is included in the firestore.rules file in the home directory. This file can be edited to change the rules. To deploy the rules in the file, type the following line of code in the terminal:
firebase deploy --only firestore:rules
Alternatively, Editing the rules directly in the console is also possible. To do so, navigate to the Rules tab in the Firestore Database section from the firebase console sidebar then copy and paste the code that is in the firestore.rules file.
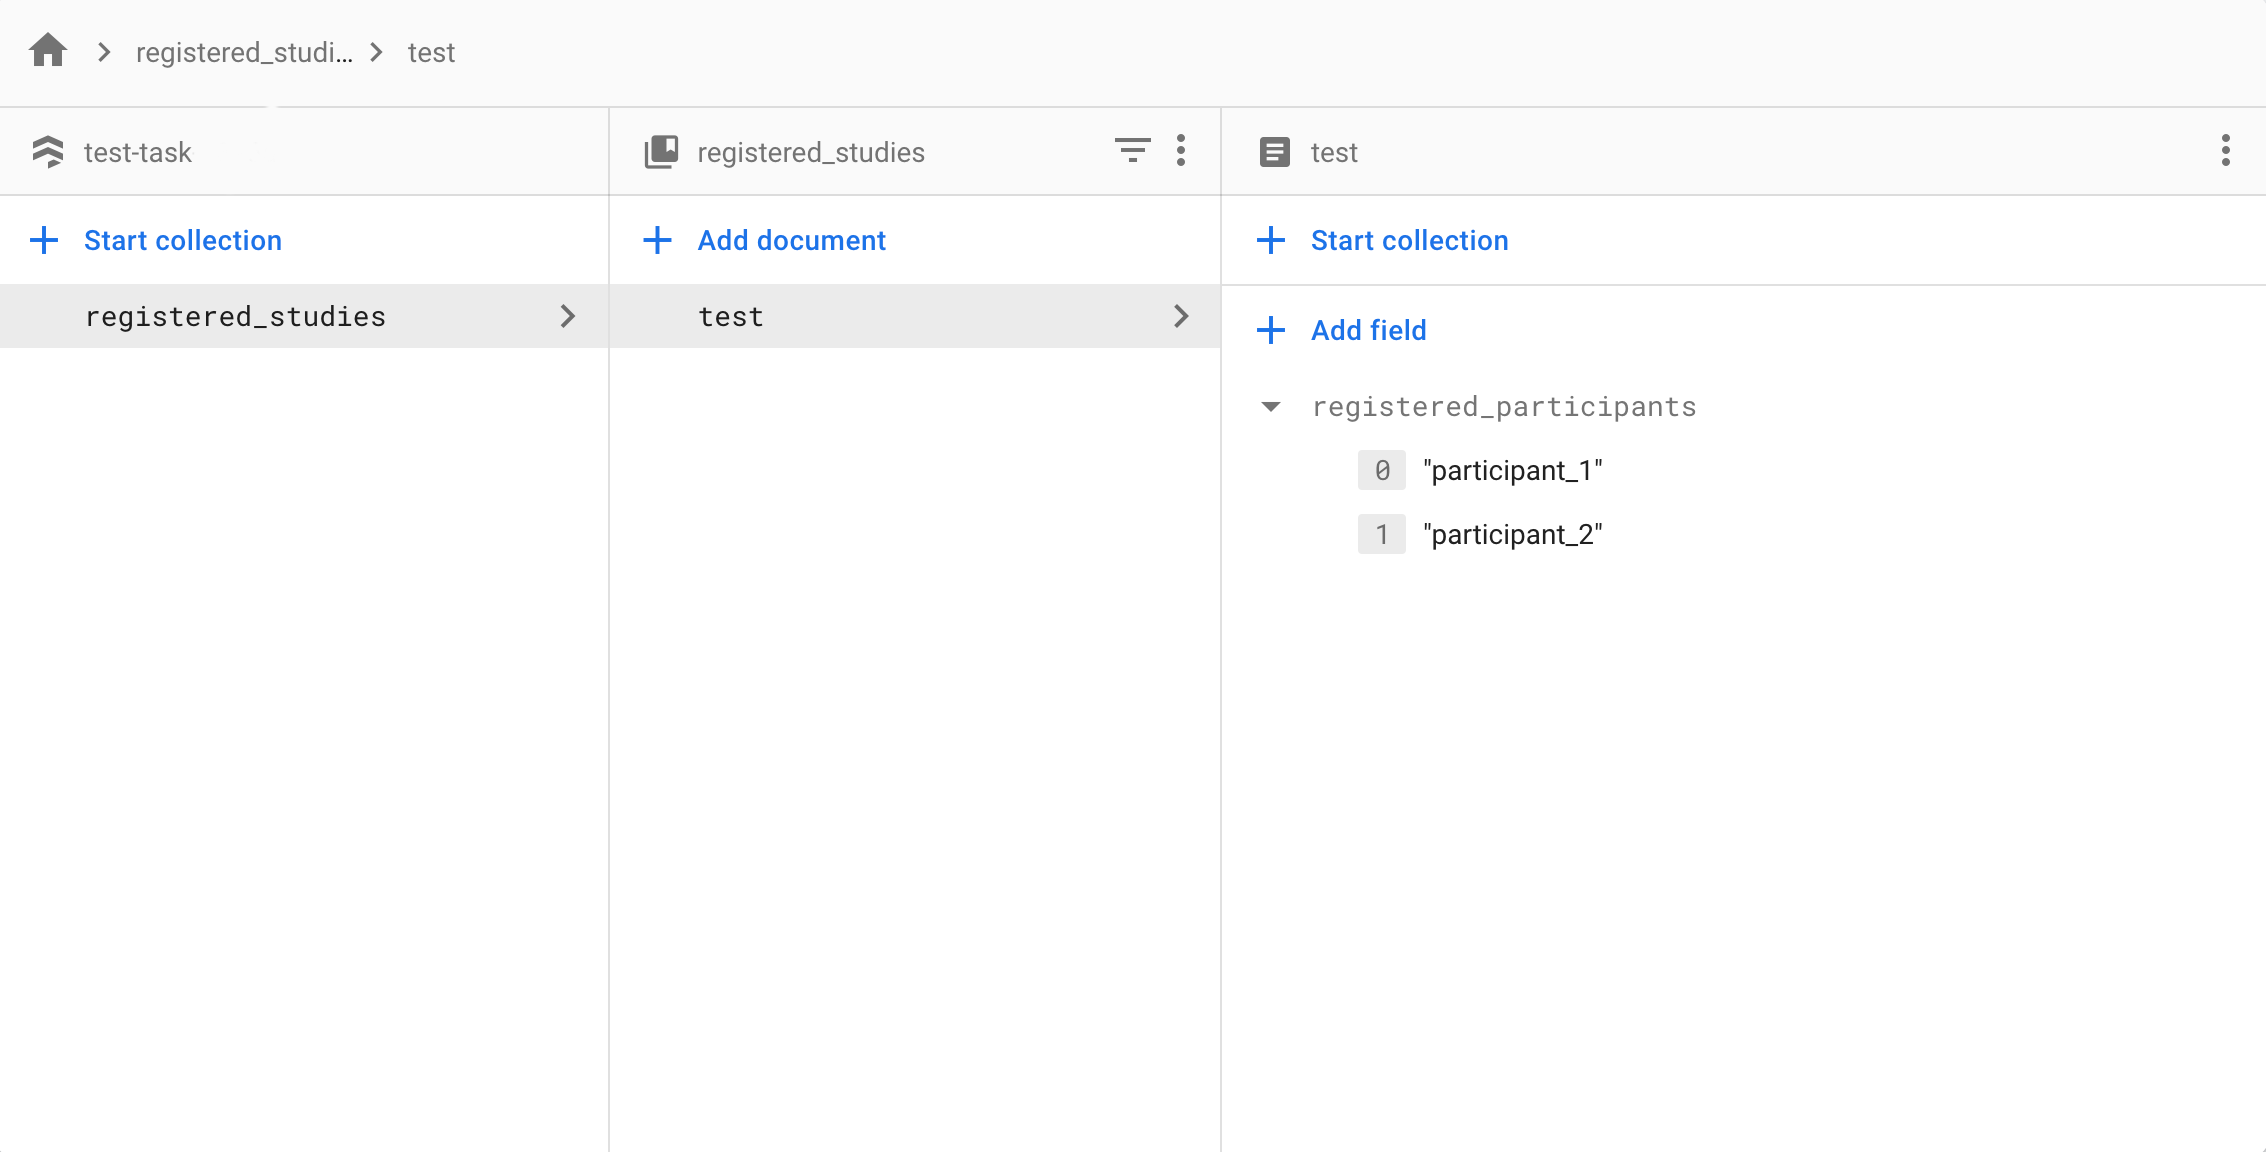
Firestore database and rules are now both deployed. For Honeycomb's default set of rules, to add an authorized participant for a study, create a collection named registered_studies, add a study with the study ID as the document name in that collection. For each registered study, add an array field named registered_participants where each element in the array will be an authorized participant for that study.
